Layers in After Effects are flat. They have an X and Y coordinate that represent height and dimension. You can move a layer, but you can only move them along those axes. This means that they are two dimensional. You can turn on the 3D layer switch so that you can also move an object along its Z axis, which is depth.
In this article, we will discuss how to:
-
Turn 2D text into 3D
-
Use the different 3D views to preview your text
-
Add a background
-
Add 3D lights
-
Add a different camera
-
Export files to Cinema 4D Lite
Turning 2D Text into 3D
To create 3D text, first create a text layer and add text, as we have done below.
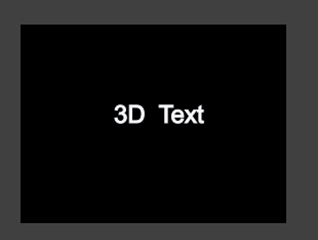
Go ahead and format the text if you want. You can change the font size, type, color, etc.
Once you are finished, click on the Selection tool in the Tools panel. Go to the Timeline panel and click in the 3D Layer Switch column so the 3D Layer Switch appears. We have it circled below.
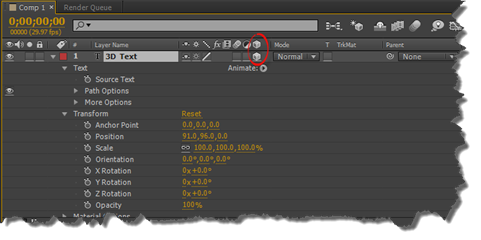
If you look at the Transform properties for your text layer, you will see the Z axis. There is also a new property below Opacity called Material Options.
Now, look at your text in the Composition panel.
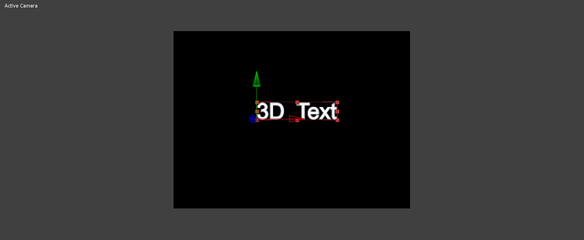
The red arrow controls the X axis. The green arrow controls the Y axis, and the blue arrow controls the Z axis.
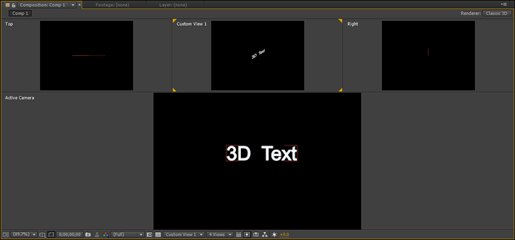
Exploring the 3D Views
Let's go to the bottom of the Composition panel. Click on the Select View Layout menu.
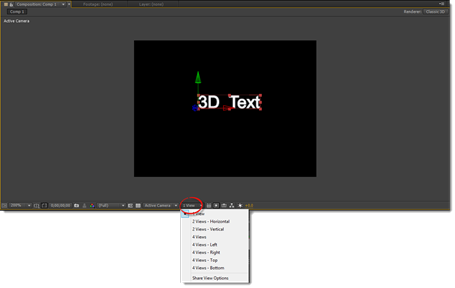
We are going to choose 4 Views – Top. However, if you have a small monitor, you may want to choose 2 Views.
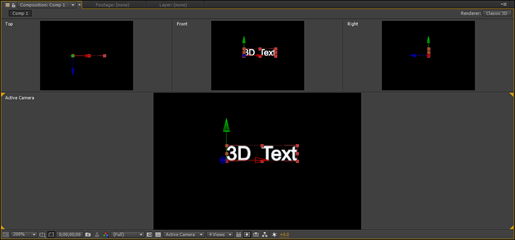
In 4 Views, the Top shows along the Y axis. The Front shows the view from the front. The Right shows you the view from the X axis. The Active Camera shows you what the camera sees. The only problem is all the text looks flat. It does not look three dimensional.
Let's click on the Front view.
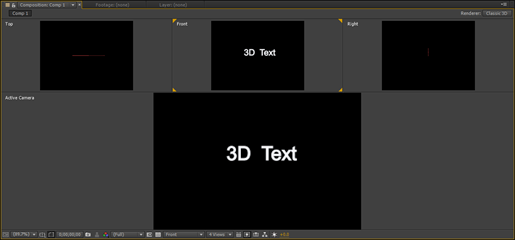
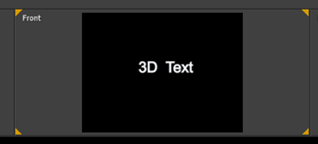
The orange triangles in each corner let us know that the Front is now the active view.
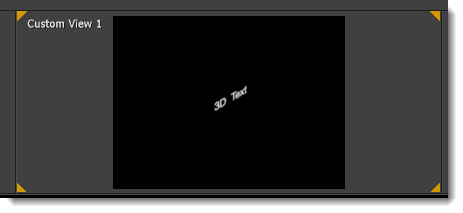
Go back to the 3D menu and choose Custom View 1.
If you look at Custom View 1 above, you will see the text now has 3D qualities.
Adding a 3D Background
Now let's import a background and add it to our composition.
As you can see in our Timeline panel, we have added an image for a background.
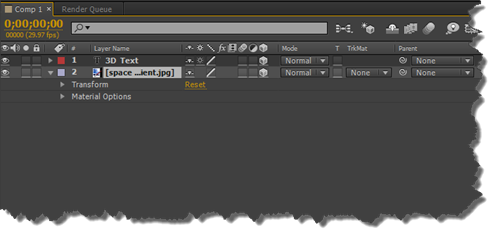
We also clicked the 3D Layer Switch.
Next, we are going to make sure the background layer is selected, then go to the Right view in the Composition panel.
You can drag the Z axis, to the right. This moves the background layer behind the text even further.
Go back to the Timeline panel, and adjust the position for the background layer.
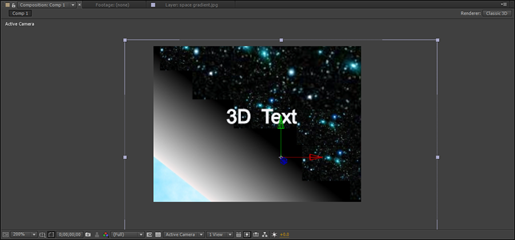
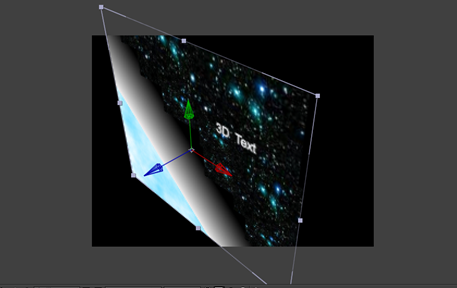
Below is Custom View 3 after we have dragged the blue arrow and adjusted the Position property for the background layer.
Adding 3D Lights
When you add light in After Effects, it shines on the other layers in your composition. You add light to your compositions to create shadows. Those shadows give depth and make things look more three dimensional when you look at them from the front.
There are four different kinds of light in After Effects: Parallel, Spot, Ambient, and Point. As with anything else in After Effects, you can modify them to achieve the look that you want.
To add a light, press the Home key, then go to Layer>New>Light. All light starts with a light layer.
You will then see the Light Settings dialogue box.
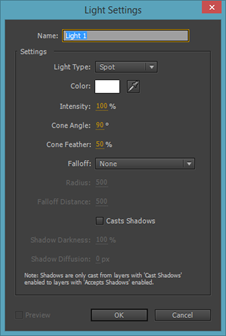
In the dialogue box, name the new layer, then choose the type of light you want. We are going to choose Spotlight.
Chose a color, then adjust the other settings. These will depend on the composition and the object that you want to feature in the light.
Click OK when you are finished.
Note that the point of interest (our text) is in the cross-hair in the Composition panel.
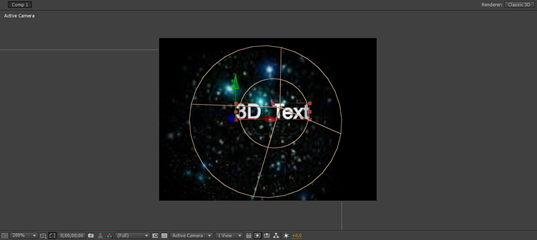
Now let's position the spotlight.
To do this, select the light layer in the Timeline panel, then press P so that you can see the Position property.
Move the light so it is above and in front of the object, as shown below.
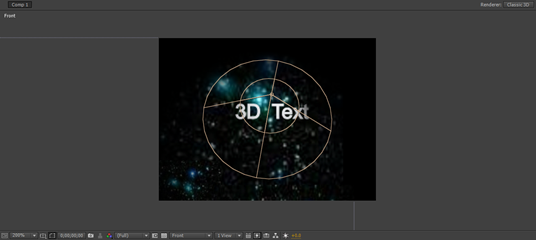
The snapshot above is Front view with the light. Earlier in this article, we saw Front view without the light. Take a look at the snapshot below to see the 3D effect that the light added to our text.
Now select your text layer. You can adjust the Material Options properties to adjust the surface properties of a 3D layer. In addition, you can set the properties for shadows and light.
Take some time to change the Material Options values and see how they affect your text. If you do not like a change that you make, you can go to Edit>Undo to undo it.
Adding Camera Layers
Camera layers allow you to view other 3D layers from different distances and angles. Let's explore how this works to see the affect it will have on a composition.
To create a new camera layer, go to Layer>New>Camera.
You will then see the Camera Settings dialogue box.
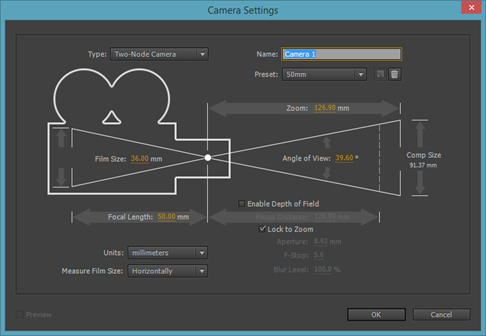
Let's choose 35mm from the Preset dropdown, then click OK.
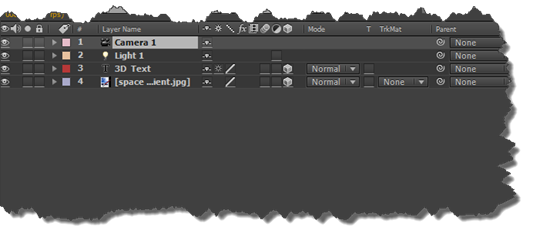
If you look at your Timeline panel, the camera layer is on top of the layer stack.
The new perspective given by the new camera layer is shown in the Composition panel. Make sure you switch to Active Camera view.
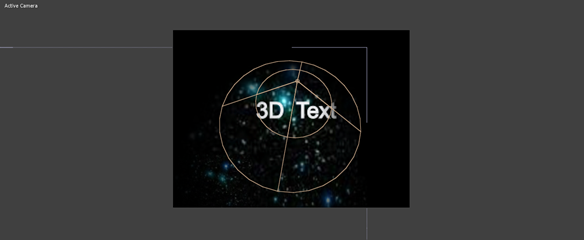
This is 35mm in Active Camera view.
Below is 20mm.
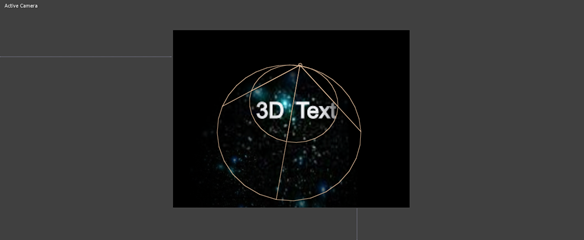
Now let's switch to 2 Views – Horizontal. This shows us how our camera is positioned.
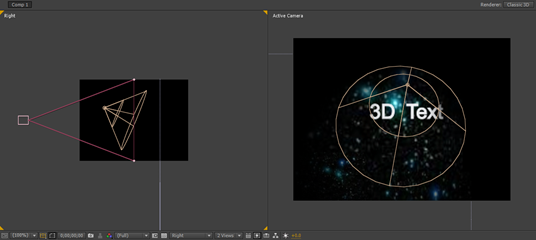
Now we can make the camera move. To do this, go to the Timeline panel. Select the camera layer, then press P.
Create a keyframe by clicking on the stopwatch beside Position.
Next, change the Z axis value.
Move the playhead to a different location, then change the Z axis value again.
You can make the camera move closer to or further away from an object by doing this.
Exporting Files to Cinema 4D Lite
With Cinema 4D Lite, you can insert 3D objects into After Effects without pre-rendering passes. You can import 3D objects, create 3D objects, and edit 3D objects with this program. You can export After Effects files to Cinema 4D, then use the Cinema 4D program to create and edit 3D objects if you know how to use the program.
However, you need to first make sure that are coordinates line up between After Effects and Cinema 4D. For example, 0,0,0 is in the upper left corner of the scene in After Effects. It is the center of the screen in Cinema 4D. To make sure they line up, we use a null object.
Go to the Timeline panel, then Layer>New>Null Object. This will create an invisible layer.
Select the new layer, then click the 3D switch so it becomes a 3D layer.
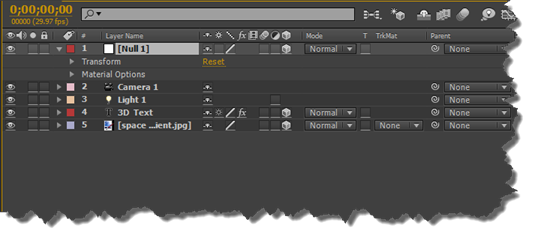
Now let's select the text layer, then Shift+Click on the background layer. For us, that is Space…
Go to the Parent column in the background layer and select the null object layer.
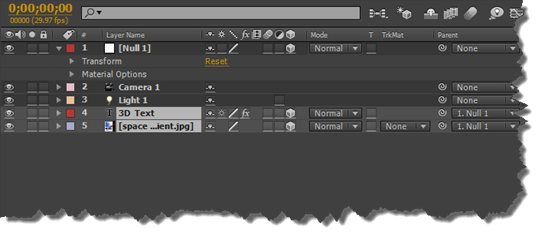
Select the null object layer, then press P. Adjust the X and Y values for the Position property to 0.
Go to File>Export>Maxon Cinema 4D Exporter.
You will see the Save As dialogue box.
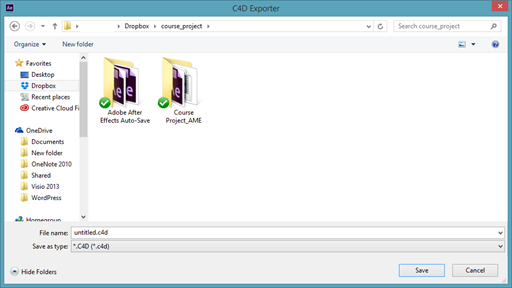
Save the file.
Next, import the file you saved back into After Effects.
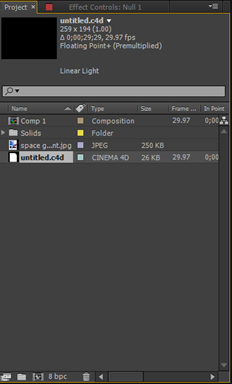
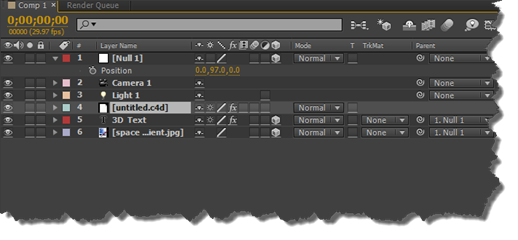
Drag the Cinema 4D file to the Timeline panel.
We placed it between the light and 3D text layers.
In the Effects Control panel, we now see the Cineware effect.
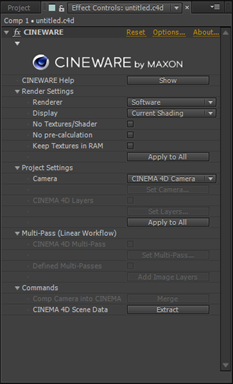
Choose Software or Standard (Draft) from the Renderer menu unless you are ready to render your project. In this case, you would choose Standard (Final).
We are going to choose Standard (Draft) because Software creates a very low-resolution file.
In the Camera menu, choose Comp. We chose this so we can use the camera we created in After Effects to refine camera motion.
Now, if you take a look at our composition, you will not see the text layer we had in After Effects. Cinema 4D did not export it.
We are going to use Cinema 4D to create extruded text. To do this, go back to the Project panel and select the C4D file. Go to Edit>Edit Original.
Advanced Video Creation and Editing Techniques
We are going to spend this section introducing you to some of the advanced video creation and editing techniques that After Effects offers. As with most effects and animation in After Effects, mastering these techniques takes time and practice. However, the time and practice is not necessarily a reflection on the level of difficulty. Instead, it is learning how to achieve the look at that you want.
In this section, we will cover how to:
-
Use the 3D Camera Tracker
-
Stabilize footage that is shaky or jittery
-
Use single-point motion tracking
-
Create a particle effect
-
Create a slow motion effect
The 3D Camera Tracker Effect
The 3D Camera Tracker Effect lets you take 2D footage that you import and add 3D layers to it. For example, you might have footage of a drive you took down a country road. You can add 3D text to that footage that labels the roads by name. The text will look like it is sitting on the road.
To use the 3D Camera Tracker effect, start by importing 2D video into your project, then adding it to your composition.
Click the Audio icon in the Timeline panel, beside your footage, to mute the sound.
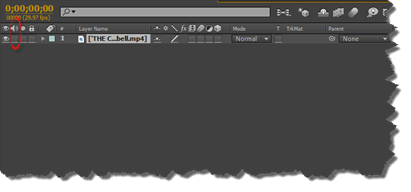
Next, select the layer, then right click on it.
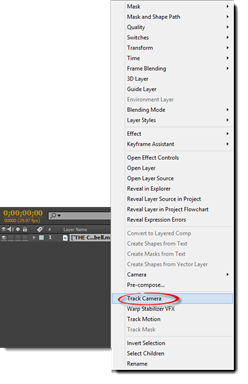
Choose Track Camera from the context menu.
The Effects Control panel opens. After Effects analyzes your footage for you. You will see this message in the Composition panel:
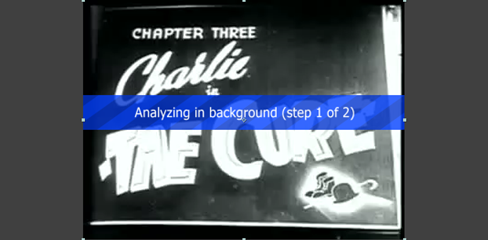
Once it completes the analysis, it will provide tracking points in the Composition panel. These tracking points are different sizes. The size of the tracking point will tell you the proximity to the virtual camera. Larger tracking points are closer, for example.
If you want, you can perform a detailed analysis to get a better idea of the camera position. To do this, go to the Effects Control panel. Click the triangle next to Advanced. Put a checkmark beside Detailed Analysis.
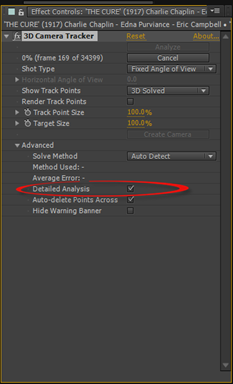
Depending on your computer and the length of the video, this process could take a while.
If After Effects cannot solve the camera, go to the Effects Control panel after it has finished analyzing the footage. Click the triangle beside Advanced and try the different solve methods. In the snapshot below, it is set to Auto Detect.
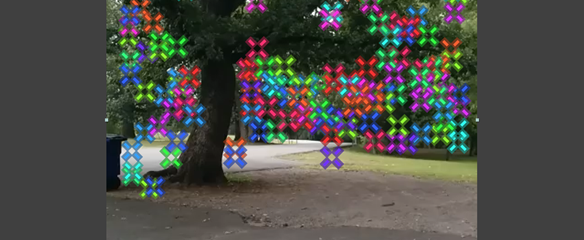
Creating a Ground Plane and Camera
Now you need to add a 3D camera to your scene. We are going to work to do that.
Go to the Composition panel. Hover your mouse between tracking points. As you can see, they look like X's. When you do this, you will see a semi-transparent triange, along with a red target.
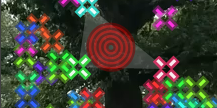
Right click, then select Set Ground Plane and Origin. This is a reference point where the settings are 0,0,0. You will not see anything change in the Composition panel, but this is going to make it so you can change the camera's rotation and position.
Next, right click the same plane. This time choose Create Text and Camera.
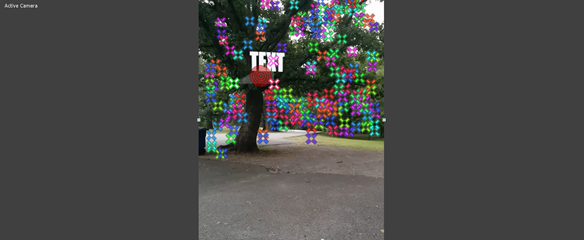
Now look at the Timeline panel. You will notice that two layers have been added.
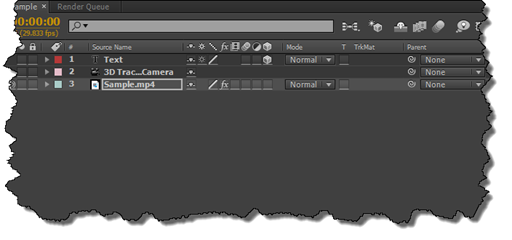
You will see a text layer and a 3D Tracker Camera layer.
Double click on the text layer. The Character and Paragraph panels will open.
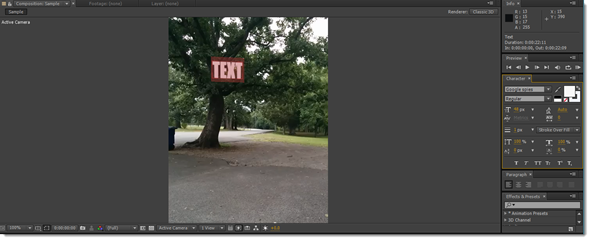
You can format the text if you want.
Go back to the Timeline panel. Press R to see the Rotation property. Change the Orientation values to see what it does to the text.
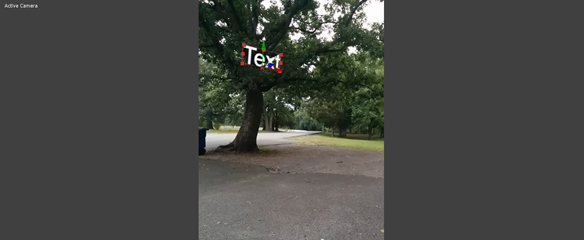
Double click the text layer again. This makes it active in the Composition Panel.
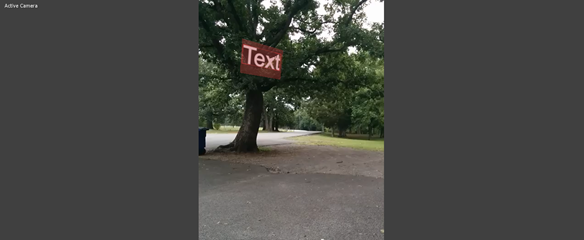
We can now type in our own text.
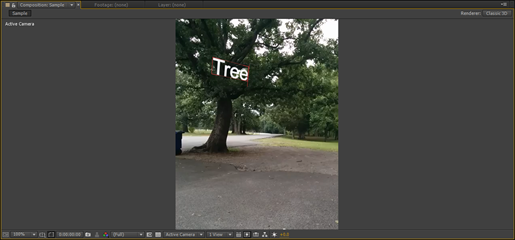
If you want, you can change the orientation of the text again. Look at the 3D feel of our text below.
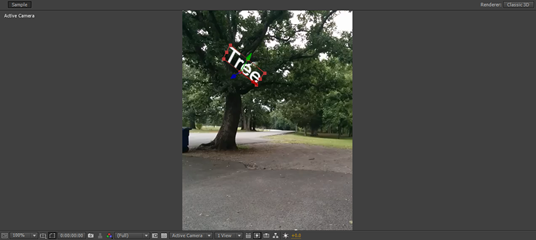
Adding Shadows
To make our text look more realistic, we are now going to add a shadow to the text we added below.
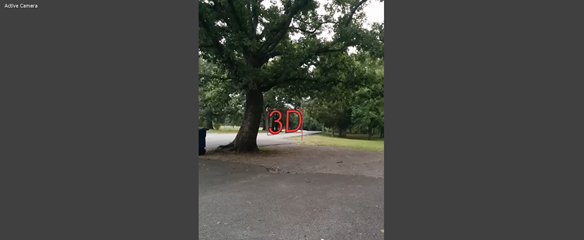
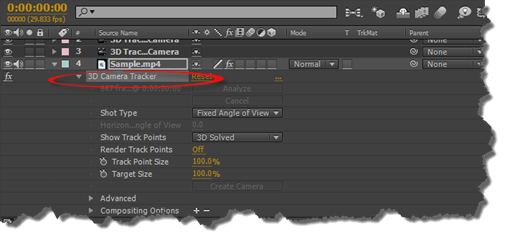
To do this, select your video in the Timeline panel, then press E.
Click the select the 3D Camera Tracker Effect.
Click on the Selection tool in the Tools panel, then locate the same plane again.
Right click, then select Create Shadow Catcher and Light.
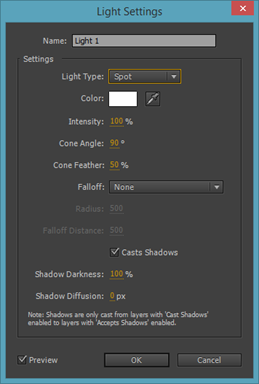
You now have a new light layer in the Timeline panel. Select it, then press P to see its properties, then adjust them to start to achieve the look you want.
Next, go to Layer>Light Settings to change the type of light, intensity, color, etc.
Adding Ambient Light
If your text looks black at this point, do not worry. We are going to add ambient light to fix it.
Go to Layer>New>Light.
Select Ambient from the Light Type menu.
Chose a color and value for the intensity. We are going to set the intensity to 80%.
Click OK.
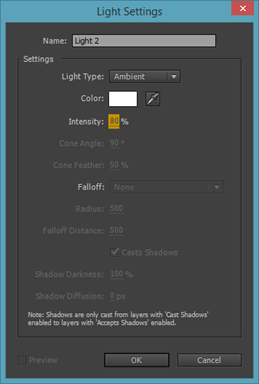
Go to your movie layer in the Timeline panel.
Adjusting the Depth of Field for Your 3D Camera
To do this, select the 3D Tracker Camera layer in the Timeline panel, then go to Layer>Camera Settings.
You will then see the Camera Settings dialogue box.
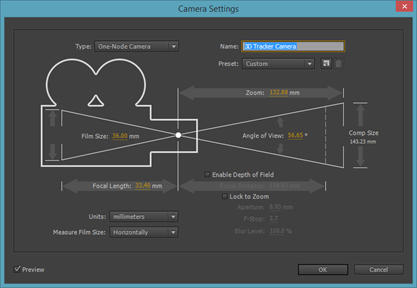
Put a checkmark beside Enable Depth of Field.
You can also set the focal distance, then change the F-stop value and focal length.
Click OK when you are finished, then go back to the Timeline panel.
Select all layers except audio.
Click on the Motion Blur switch for one layer. It should apply itself to all other layers.
Stabilizing Shaky Footage
If you have ever used a handheld camera to shoot video, then you know firsthand how shaky the footage can be when you play it back. The good news is After Effects offers an editing tool that will help you fix that problem.
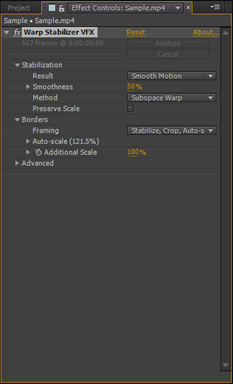
Warp Stabilizer VFX removes those jitters to make the motion in video appear to be smooth. It does this by scaling the layer to offset the movement.
To use Warp Stabilizer VFX, select the layer you want to apply it to, then go to Animation>Warp Stabilizer VFX.
You will see a banner appear across the footage in the Composition panel, just as you did with the 3D Camera Tracker.
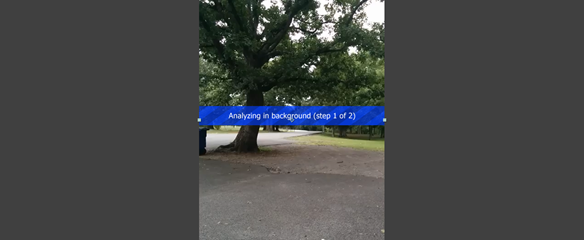
Once it is finished analyzing your footage, it will then stabilize the "jitters."
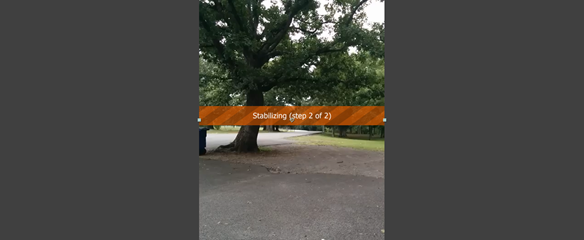
When the orange banner disappears, you can create a RAM preview to see the changes.
You can adjust the settings for the Warp Stabilizer VFX in the Effects Control panel.
Single-Point Motion Tracking
Motion tracking gives you a way to synchronize background layers with computer-generated effects. With single-point motion tracking, you can track a defined area in the shot, then take that movement and apply it to other layers.
To use single-point motion tracking, select a video layer in the Timeline panel, then go to Animation>Track Motion.
You will see a tracking point appear on your composition in the Layer panel.
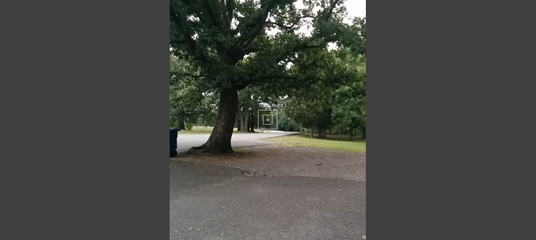
You will also see the Tracker panel open.
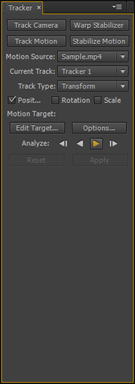
Click on the Selection tool in the Tools panel, then drag the track point on your composition to the portion of the layer that you want to track.
The track point (in the Layers panel) has three regions: the inner box or feature region, the outer box or search region, and the attach point (the X).
-
The feature region defines the element that is to be tracked.
-
The search region lets After Effects know what area to search to locate the element.
-
The attach point lets after Effects know the place of attachment for the target that is to be tracked.
Once you have everything in place, click on the Analyze Forward button located in the Tracker Panel. It looks like this:  .
.
After Effects then performs an analysis of the footage. During the analysis, make sure the track point stays with the element you want to track. If it does not, press the spacebar and relocate the feature region.
Click the Apply button once After Effects is finished with its analysis.
In the Motion Tracker Apply Options, choose X and Y from the Apply Dimensions menu, then click OK.
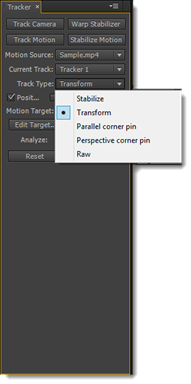
NOTE: You can also use multi-point motion tracking which tracks either three (parallel corner pinning) or four (perspective corner-pinning) points in the source footage. To begin to use multi-point motion tracking, go to the Tracker panel and choose either Perspective Corner Pin or Parallel Corner Pin from the Track Type menu.
The Particle Simulation Effect
The Particle Systems II effect can create something that looks like a supernova or even fireworks in your composition.
To see how it works, create a solid layer by going to Layer>New>Solid.
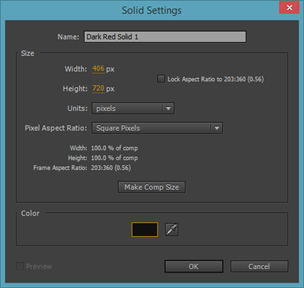
Make the layer color black, then click OK.
Next, go to Effect>Simulation>CC Particle Systems II.
You will not see anything in the Composition panel until you press the spacebar. When you press the spacebar, watch the show before your eyes.
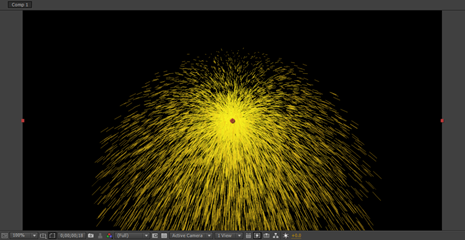
To customize the effect, go to the Effects Control panel.
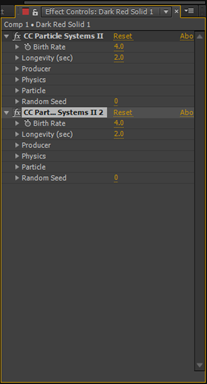
In the Physics property group you can change the gravity property to change how the particles fall. In the Particle property group, you can change the size and appearance.
Experiment with the effect using the Effects Control panel. The best way to learn what each effect can do in After Effects is to take the time to practice using them.
The Timewarp Effect
The Timewarp effect lets you apply a slow motion effect to a layer.
To see how it works, select a layer for which you would like to apply the effect.
Go to Effect>Time>Timewarp.
In the Effects Control panel (pictured below), go to the Method menu and select Pixel Motion. From the Adjust Time By menu, select Speed. Speed controls the time by a percentage.
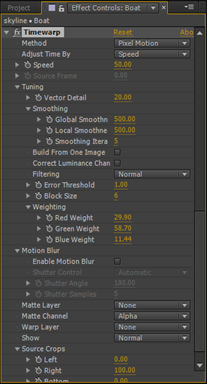
For example, move the playhead in the Timeline panel to where you want the speed to change. Change the speed to 100, then click the stopwatch to add a keyframe. This tells After Effects to set the speed at 100% until it reaches that keyframe.
Next, move the playhead up by a few seconds. Change the speed to 10. Another keyframe is added that lets After Effects know to set the speed at 10%.
Move the playhead forward again, set the speed to 100% and click the stopwatch.
You have just created a slow motion effect.


