Adobe After Effects allows you to create animation and special effects for graphics-related projects. You can use After Effects to animate, alter, and composite media using various tools and optional plug-ins. The program is widely used by motion-graphics professionals, website designers, and visual effect artists for post-production on digital films, DVD, video, and the web.
What's New in After Effects CC
This article was written using After Effects CC 2014 (version 13.0), because it is the most recent and updated version of the After Effects program. The notable updates and improvements to this version of the software program are listed below.
They include:
-
The ability to preview your video on an external monitor using Mercury Transmit.
-
Compositing options for each effect.
-
The ability to import masks from Adobe Premiere Pro.
-
HTML5 panels.
-
The ability to edit text templates that you create in After Effects in Premiere Pro.
-
The ability to import Sony RAW footage as well as MPEG-4 SStP (Simple Studio Profile) Sony SR MXF files.
-
And more.
|
NOTE TO STUDENTS
|
Introducing the After Effects Workspaces and Interface
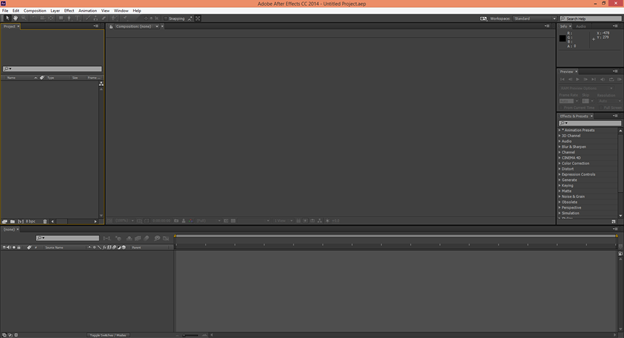
The After Effects interface is pictured below. This is what you will see each time that you open the After Effects program on your computer.

At the top of the After Effects application window, you will see the Menu Bar. It looks like this:

You will find the tools and commands that you need to successfully use After Effects in the Menu Bar. However, much of the time, you will find that you can also access the same tools and commands in the panels.
Below the Menu Bar, you will see the Toolbar.

You will use the toolbar a lot in After Effects.
The Adobe Effects interface is made up of panels. Unlike a lot of other programs you have probably used in the past, Adobe After Effects contains several different workspaces, each featuring panels related to the workspace.
Below is the Standard workspace. The panels displayed in the Standard workspace contain the tools and commands you will need when working in this workspace.
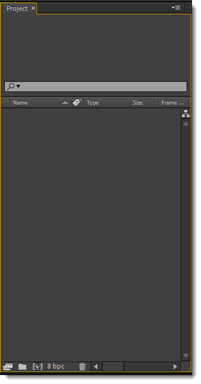
The Project panel is pictured below.
When you change the workspace, some of the panels will change as well. Again, this is so the tools and commands that you need are right there when you need them.
To change the workspace, go to the Workspace menu to the far right of the Toolbar. We circled it in red in the following snapshot.
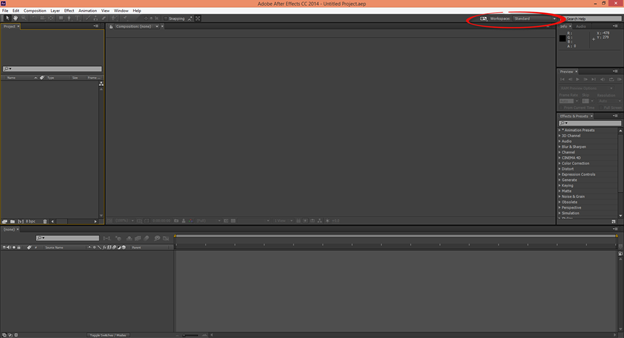
Click the downward arrow to the right of Standard.
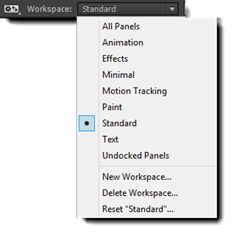
You will then see the various workspaces that you have to choose from. You will choose the workspace by the task that you need to complete. If you wanted to work with text, for example, you would choose the Text workspace.
The Text workspace is shown below.
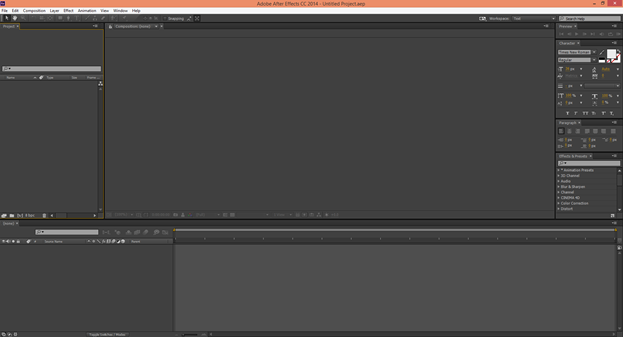
Note that with the Text workspace, we see the Character panel.
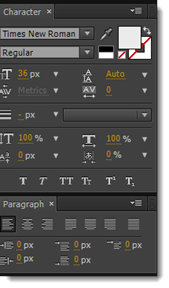
You can add or remove panels from a workspace by going to Window in the Menu Bar. Panels with a checkmark beside them are already showing in the workspace. Click to remove the checkmark and remove it from the workspace. Place checkmarks beside panels that you want to appear.
Adjusting the Brightness of the After Effects Screen
If you want to brighten or dim the interface in After Effects, go to Edit>Preferences>Appearance.
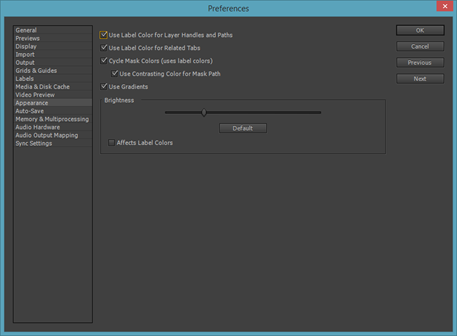
Drag the brightness slider to the right to increase the brightness. Drag it to the left to decrease it.
The After Effects Workflow
A workflow is a series of steps that you take to complete a project using a software program, such as Adobe After Effects. Although following the workflow is not mandatory and ultimately will not affect the outcome of your project, it does make things quicker and easier.
The After Effects workflow has six steps. These steps are listed below.
1. Import and organize your footage.
2. Create your compositions and arrange layers.
3. Add Effects.
4. Animate Elements.
5. Preview your work.
6. Render and output the final composition.
Finding Help in After Effects
If you need help while using Adobe After Effects, there are several places that you can find it.
The first place is within the program itself.
Type the topic for which you need help into the search box. As you can see below, the search box is to the right of the Workspace menu.

We are going to type "Add text," then press Enter on our keyboard.
When you press Enter, your Internet browser will open a window. You will be taken to Search Support on the Adobe website, as shown below.
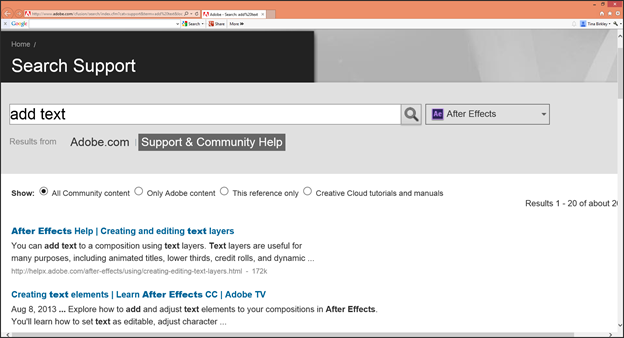
You can scroll through the search results and choose which result seems to provide the answer you need.
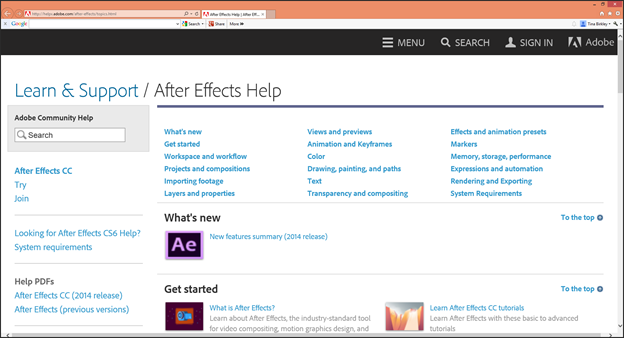
You can also go to Help in the Menu Bar, then After Effects Help (Help>After Effects Help).
Once again, a browser window will open to Adobe.
Getting Started in After Effects
There are three things that you need to do in After Effects before you can get started on any project. You need to create the project, import footage into the project, then create a composition that serves as a container for the footage. Each piece of footage that you import becomes an individual layer in your composition. You can then work with those layers to add effects.
In this section, we will discuss how to:
-
Create a project
-
Import footage
-
Import Photoshop or other layered file types
-
Create a composition
-
Work with composition settings
-
Work with layers
-
Preview your work in After Effects
Creating a Project
By definition, a project in After Effects is a file that stores all references to all footage that you use in the project. A project also contains compositions. Compositions are containers that are used to combine footage and add effects.
When you first open After Effects, you will see this dialogue box:
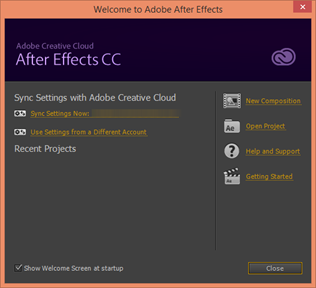
This is the Welcome Screen. From here, you can open a new composition, open a project, or find help and support.
For the purpose of this article, click Close.
To create a new project, go to File>New>New Project.
If you do not have a project open or do not open a project on the Welcome Screen, After Effects automatically creates a new project for you. The default name is Untitled Project.aep.
Importing Footage from Your Computer
Once you have created a new project, go to File>Import>File. In order to start a new project, you must import footage into it. All projects contain footage.
When you click File>Import>File, you will see the Import File dialogue box:
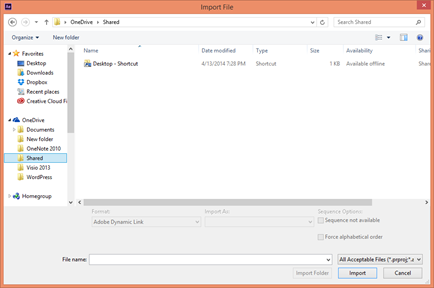
Locate the footage that you want to import, then click the Import or Open button.
You will see a thumbnail preview of your footage in the Project panel on the left.
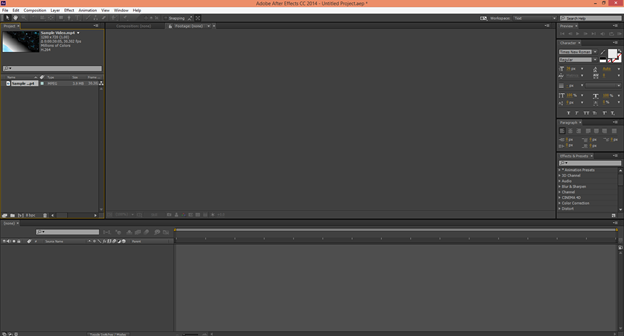
You can import all kinds of footage into After Effects. This includes audio files, layered files from Adobe Photoshop or Illustrator, images, video clips, other After Effects projects, and projects from Premiere Pro.
A Word About Audio
After Effects is not an audio editing program by any means. However, you can use some audio effects in After Effects to control the sound and quality.
In addition, you can also loop audio clips in your compositions if the composition is longer than your audio track.
There are two ways to loop audio. The first is to create a duplicate audio layer, then set the duplicate layer to start playing when the source layer ends. This is a lot of work, and there is an easier way.
If you need to loop audio, right click on the audio clip in the Project panel. Select Interpret Footage>Main.
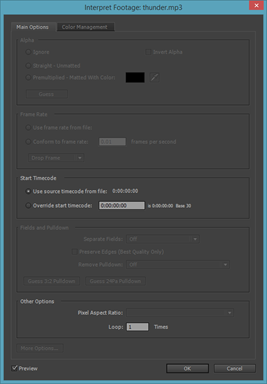
In the Other Options section, you can set the audio clip to loop as many times as you would like.
Click OK when you are finished.
Importing Photoshop or Other Layered Files
Once you import your footage for a project, you will create a new composition. However, for now it is important to understand that a composition combines all the footage that you import.
That said, if you want to import a Photoshop or Illustrator file that contains several layers (that have not been merged or flattened), you will need to import that file as a composition.
To do this, go to File>Import>File.

Navigate to the file, then click on it to select it.
In the Import As field, select Composition.
Click the Import or Open button.
You will then see the following dialogue box:
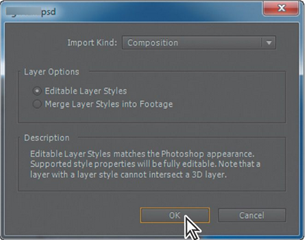
Make sure the Import Kind field is set to Composition.
Also, make sure Editable Layer Styles is selected.
Click OK.
You will then see the footage in the Project panel.
NOTE: When you import footage into After Effects, After Effects creates a reference link to the source file. It does not actually import the footage. This allows project sizes to remain small. You can go to File>Dependencies>Find Missing Footage if After Effects notifies you that it cannot find a source file. If you have moved the file, you will need to relocate it for After Effects.
Creating Compositions
Once you have created a project and imported all the footage for that project, you are ready to create a composition. A composition contains all your footage, as well as the animation, layering, and effects. It has both temporal – or time – dimensions and special dimensions. You will see what we mean in just a minute.
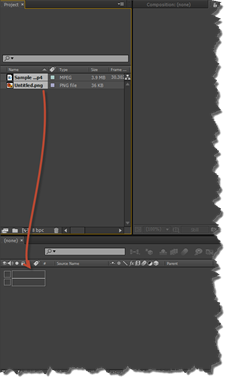
To create a composition, go to the Project panel. Ctrl+Click on all your footage items.
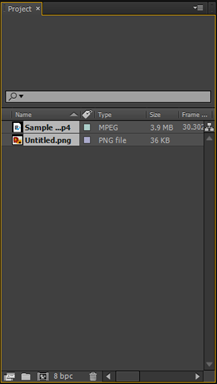
Next, drag the footage items to the Timeline panel, as illustrated below.
You will then see the New Composition from Selection dialogue box.
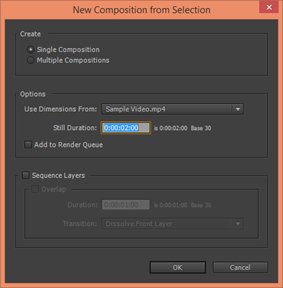
The dimensions used for the new composition will be based on the footage you selected.
You can change the dimensions to match any of the footage that you have selected:
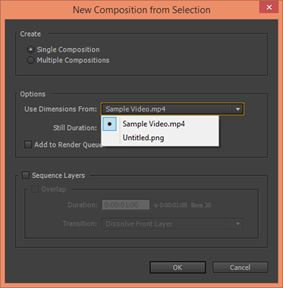
Click OK when you are finished.
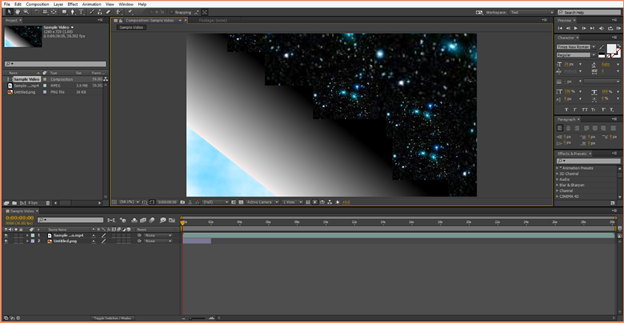
The footage items that you selected to include in the composition are shown as layers in the Timeline panel.

If you look at the snapshot of the Timeline panel above, you will see two layers, labeled 1 and 2.
Our After Effects workspace is pictured below.
Working with Composition Settings
The lengths of the footage that you add to a composition may vary. For example, you may have footage that lasts 1:10 and another that lasts 1:50. If you want, you can change the length of the entire composition to match the length of one piece of footage.
To do this, go to Composition>Composition Settings.
You will then see the Composition Settings dialogue box.
Go to the Duration field and enter the desired duration for the composition.
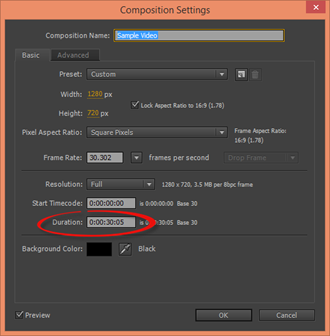
Click OK when you are finished.
Introducing Layers
Layers are the elements that build a composition. As we discussed in the last section, any footage that you add to a composition becomes a new layer. Layers are stacked on top of each other. The order follows the stacking order in the Composition panel.
Just as with Photoshop or other photo editing programs, you can work with one layer in a composition. The changes you make to that layer will not affect other layers in the composition.
You can also use a composition as a layer in another composition. This is called nesting.
Adding a Radial Blur Effect to a Layer
Now that you have created a composition and, by doing so, created layers, you can now add animation and effects to those layers.
Let's start out by learning how to add an effect to a layer by adding a Radial Blur effect to a layer.
To do so, select a layer in your composition. We have selected a layer in the snapshot below.

Next, go to the Effects & Presets panel. This is on the right side of the window. It is pictured below.
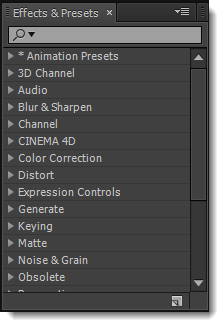
In the search box within the panel, type Radial Blur, then hit Enter on your keyboard.
You will then see the effect, as shown below.
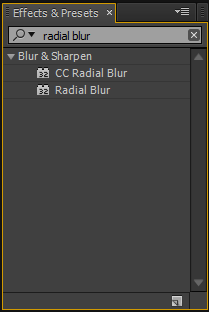
Click on the effect to select it, then drag it onto your layer in the Timeline panel. We have illustrated this below with a red line.
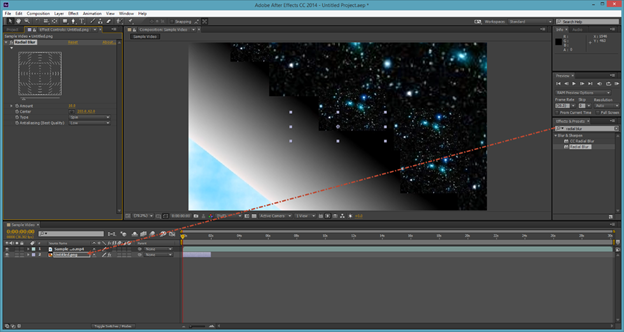
The Effect is then applied, and the Effect Controls panel then opens on the left side of the window.
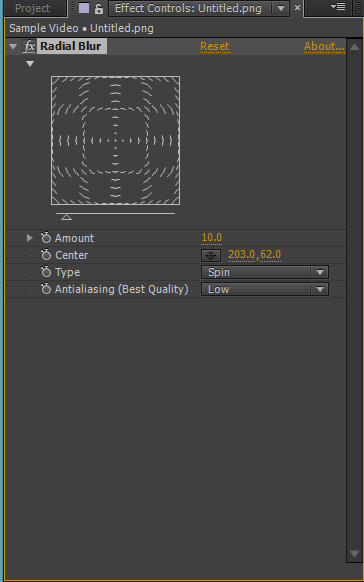
Now you can customize your effect.
Drag the number in the Amount field to increase or decrease the amount of the effect.
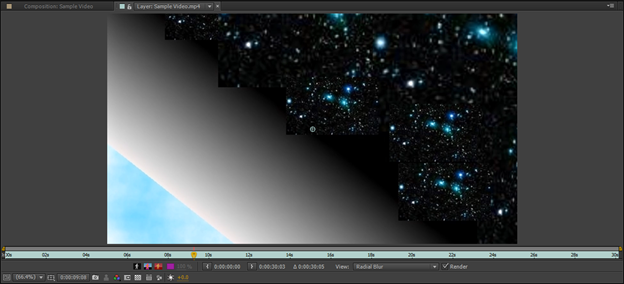
If we look at the Composition panel, we can see our before and after when we increased the effect.
Below is our before snapshot:
This is after:
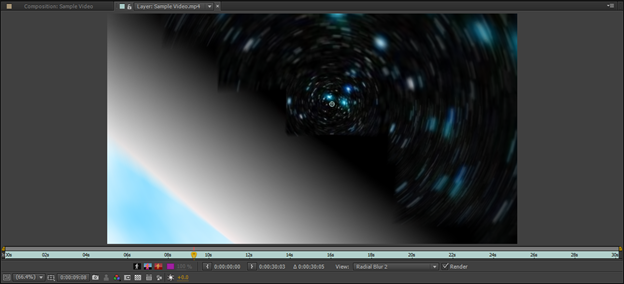
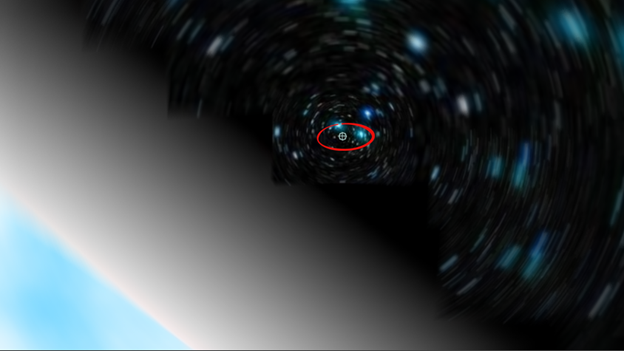
In the Composition panel, we can also move the center point of the blur by dragging on the center crosshair.
If we go back to the Effect Controls panel, we can also choose the type of radial blue: Spin or Zoom. We have chosen Zoom.
Adding an Exposure Effect to a Layer
Let's say we want to adjust the exposure of this layer to make it brighter. To do that, we will add an exposure effect.
Go back to the Effects & Presets panel. This time type Exposure in the search box.
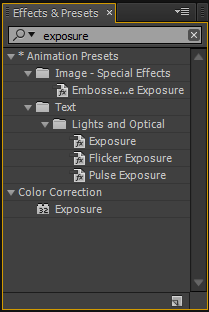
Drag the exposure effect to the layer in the Timeline panel.
Take a look at the Effect Controls panel.
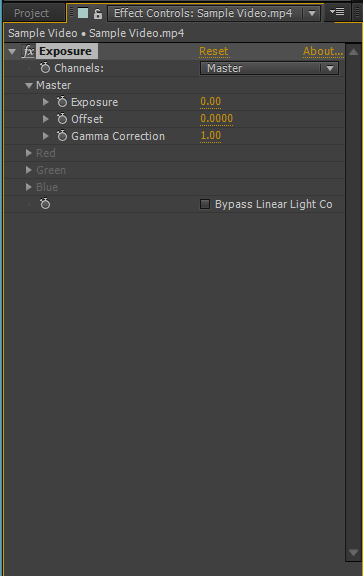
Once again, you can customize the effect.
Take time to explore the different ways you can customize the effect to get a feel of what it can do. If you want to undo a change you made, simply go to Edit>Undo.
Working with Layer Properties
As you already know, layers are stacked one upon another. The image or video that is "on top of the stack" is the one that you see when you look at your composition.
For example, the composition in the snapshot below contains two layers.
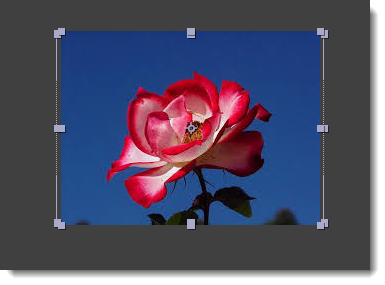
There is another layer beneath the layer that is displayed.
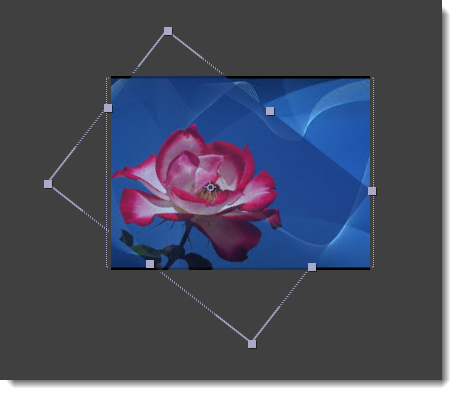
That said, you can move, rotate, scale, and change the opacity for any layer in a composition by changing the layer's properties. You can do this to change the way the layer appears with the other layers.
We are going to reposition and rotate this layer, then change the opacity.
To do this, go to the Timeline panel. Find the layer that you want to work with, then click the triangle beside the layer number, as shown below.
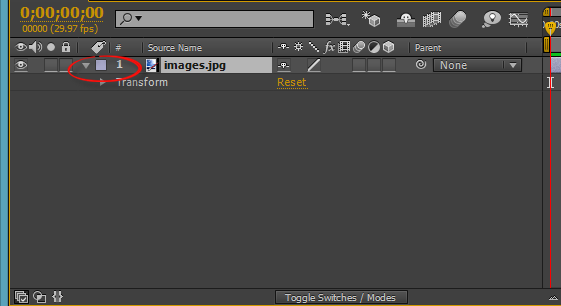
When you click on the triangle, you will see Transform (as illustrated above).
Next, click the triangle beside Transform.
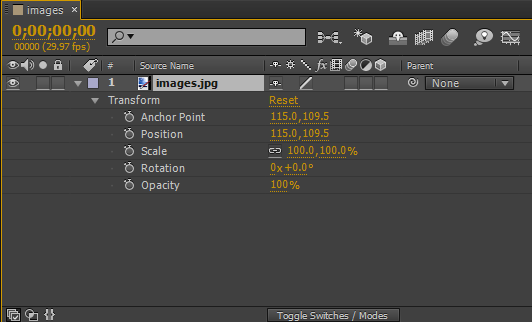
You can now change the anchor point, position, scale, rotation, or opacity by mousing over the values in yellow, then dragging to the right to increase the values – or to the left to decrease the values.
You can see our adjusted values below.
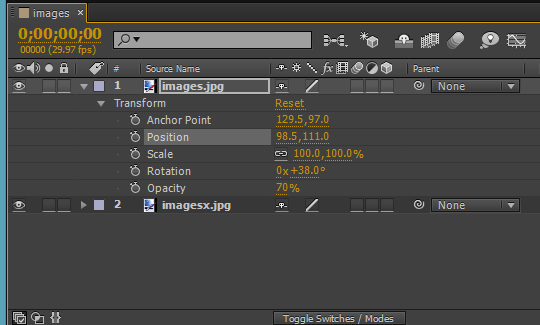
If you look at our composition in the Composition panel, you can now see the second layer, as well as the transformation we made by changing the layer's properties.
Blending Modes
The blending modes in After Effects are the same as they are in Adobe Photoshop. Blending modes determine how one layer reacts with another layer.
The blending modes in After Effects are found by going to Layer>Blending Mode.
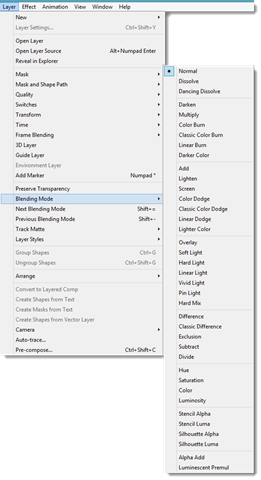
To apply a blending mode, select a layer in the Timeline panel. The blending mode you apply will affect how that layer reacts to the layers beneath it.
Take the time to select a layer in your Timeline panel, then apply the different blending modes to see what affect they have on your composition.
Below is our composition:
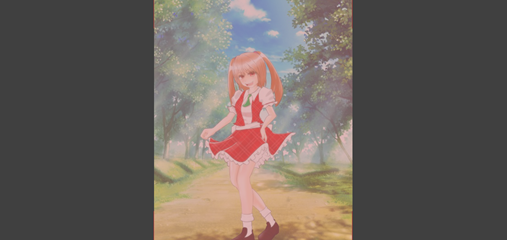
We have a background layer, then a solid layer for which we've adjusted the Opacity property to 58%.
To apply a blending mode, we are going to select the top layer, then select the blending mode.
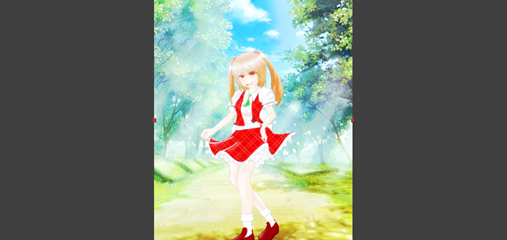
This is Color Dodge:
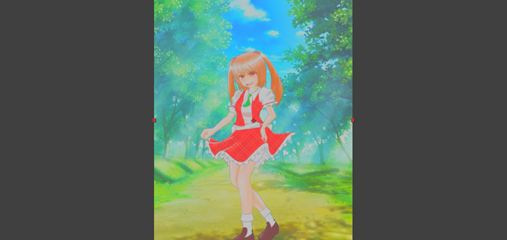
This is Luminosity:
Previewing Your Project As You Go
Being able to preview your work will be important to you as you use After Effects. You may want to see an animation played out – or make sure that effects you have added meet your expectations. There are several methods that you can use to preview your work in After Effects.
The first is standard preview. To use standard preview, go to the Timeline panel and deselect all layers.
The Video switch should be visible for all layers that you want to preview. The Video switch looks like an eye. It appears with each layer and is found in the first column, as circled below.
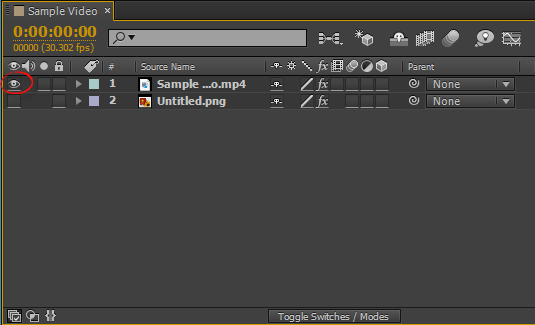
You can click to select or deselect the Video switch.
Next, press the Home key on your keyboard. This takes you to the beginning.
To play and preview your composition, press the spacebar.
You can also press the spacebar to stop playback.
Just keep in mind that standard preview playback can be slower than the actual frame rate.
The other method that you can use to preview your work is RAM preview. RAM preview will use the RAM on your computer to play the preview – with audio. It will play it to match the frame rate of the composition.
You can use RAM preview to play footage in the Timeline panel, as well as the Layer and Footage panels.
To use RAM preview, go to the Timeline and select the layers you want to preview. Make sure the Video switch appears beside those layers.
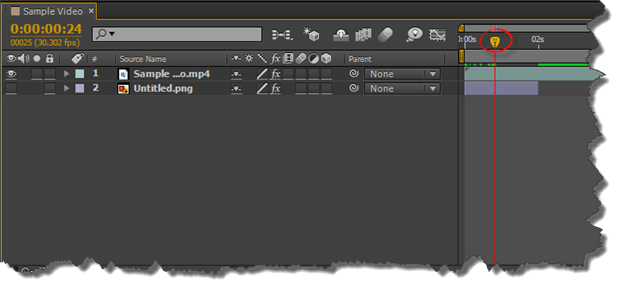
Next, drag the playhead in the Timeline to the beginning of the time ruler. The playhead is circled in red below.
You can also press the Home key.
Click the RAM Preview button in the Preview panel on the right side of the window.
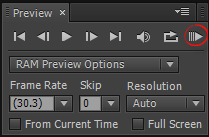
You can also go to Composition>Preview>RAM Preview.
You will see a green bar that shows you which frames are cached to RAM. When all frames are cached to RAM, your preview will play. To stop playback, hit the spacebar.


