There are two types of text in After Effects. These are point text and paragraph text. Point text is used for a single word or line of characters. Paragraph text is used when you want to enter longer sections of text that are or resemble paragraphs.
Text can be added to your compositions using text layers. It can be directly added and edited in Composition panel, then formatted using several tools available in the Tools, Character, and Paragraph panels.
In this article, you will learn how to:
-
Create point text and paragraph text
-
Format text and paragraphs
-
Animate text using animation presets
-
Work with keyframes to create motion blurs
-
Create scale keyframes
-
Animate text opacity
-
Add a motion path to text, as well as to a non-text layer
Creating Point Text
Before we start to discuss how to create and edit point text, let's switch from the Standard to the Text workspace.
The Text workspace is shown below.
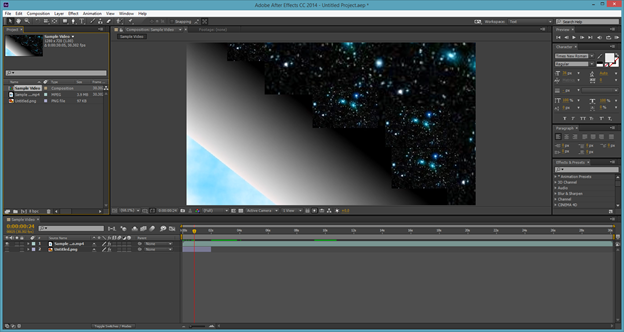
Note that the panels we mentioned earlier in this article are featured on the right side of the window. You will use these panels in this article to format text.
Go to the Tools panel, which is located below the Menu Bar. Click on the Horizontal Type tool. We have circled it below.

Now click anywhere in the Composition panel and start typing. We are going to type "Outer Space."
In the snapshot below, you can see the text we entered by clicking on our composition in the Composition panel.
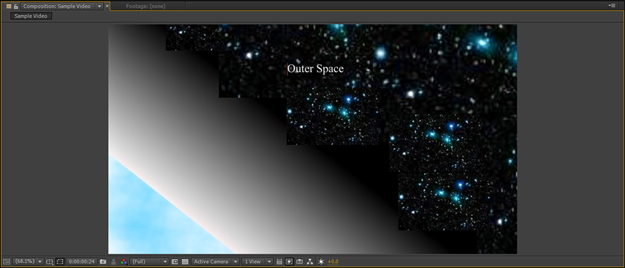
You can also look at the Timeline panel and the new text layer that has been added.

Formatting Point Text
You will find the formatting tools you need for text in the Character panel.
The Character panel is pictured below.
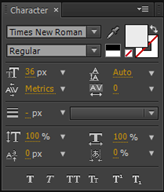
You can format all the text in a text layer by using this panel. However, if you only want to format certain parts of characters of text in a text layer, you must select the text or characters first. If you do not select text or characters, the formatting changes will be applied to all text in the current text layer, as well as the Source Text keyframes.
Practice formatting text using Character panel. Start out by clicking on the text layer in the Timeline panel to select it.
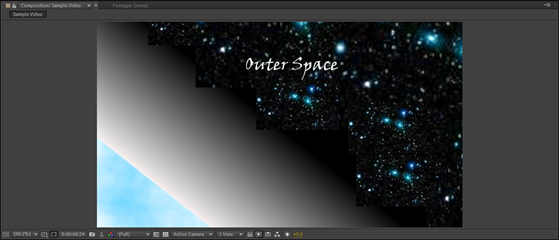
In the picture below, we changed the font size and type. We then changed the layer's properties in the Timeline panel to move the text layer.
Creating Paragraph Text
To create paragraph text, click on the Horizontal Text tool again.
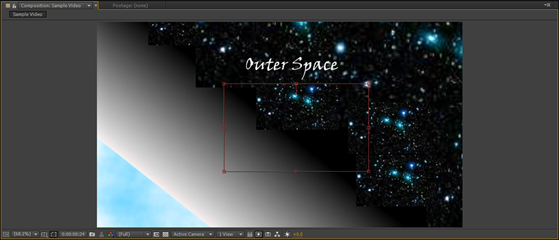
Next, go to the Composition panel. Drag your mouse in the panel to create a text box, as pictured below.
Click inside the text box, then enter your paragraph or paragraphs.
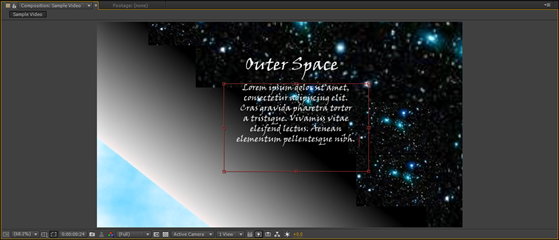
You can now use the Character panel to format the text. We are going to change the font type and size.
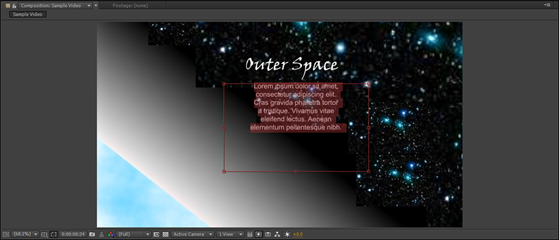
If you want, you can also drag on the handles of the text box to resize it. The handles are located on all four corners, as well as all four sides. Mouseover a handle until you see a two way arrow, then drag in to decrease or drag out to increase.
Use the Paragraph panel (show below) to format your paragraph. As you can see, we aligned our paragraph to the center.

If you want to move the text layer, remember to go to the Timeline panel, select the layer, then click the triangle. However, you can also use rulers, guides, and grids to place your text layer.
To do this, select the layer in the Timeline panel. Go to Layer>Transform>Fit to Comp Width. This will scale the layer so it is the same width as the composition.
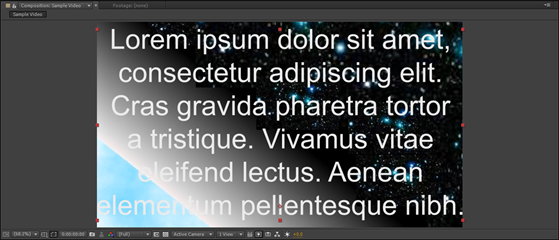
Next, go to View>Show Grid. Then, go to View>Snap to Grid.
Click on the Selection tool in the Tool panel. It looks like this: .
.
Drag the text to position it where you want it.
To hide the grid, go to View>Show Grid.
Animating Text Using Text Animation Presets
Using an animation preset is the easiest way to add animation to text. An animation preset simply has to be applied to the text. It is easy to do.
To learn how to animate text using a text animation preset, we are going to go to the Timeline panel and select the first text layer we created. This layer says "Outer Space."
Once you have selected your text layer, click the Home button your keyboard to move the playhead in the Timeline panel back to 0:00.
Next, go to Animation>Browse Presets.
Adobe Bridge will open. You must have Adobe Bridge installed for this to work.
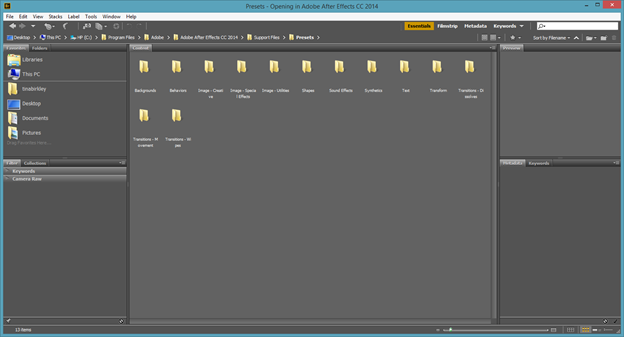
Double click on the Text folder, as circled below.
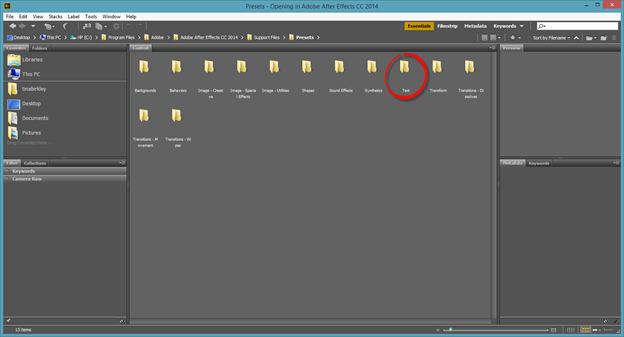
You will then see folders that represent different text animation presets.
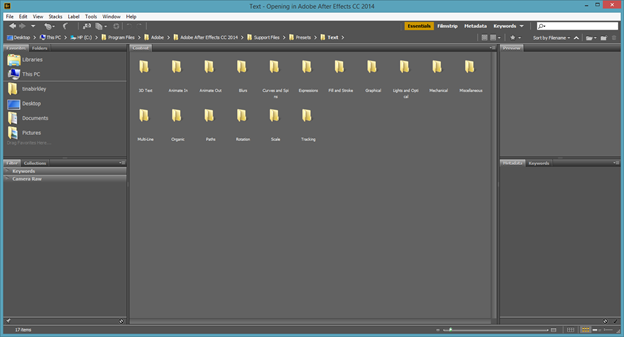
We are going to choose Blurs.
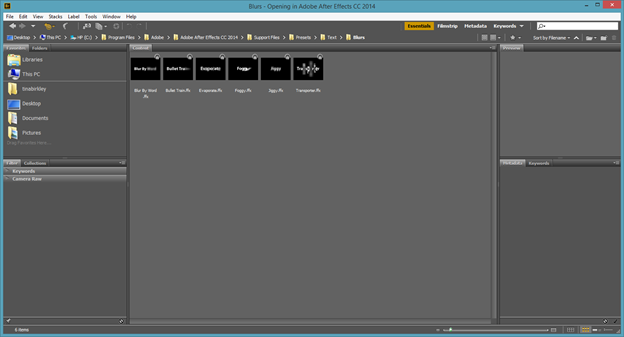
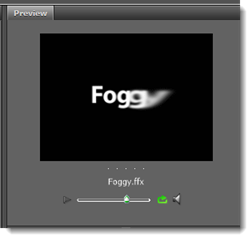
Click on a blur to preview it. We chose Foggy.
If you look at the Preview panel on the right, you can see the animation.
When you find the blur you want to apply, right click on the thumbnail of the blur, then choose Place if After Effects CC from the context menu.
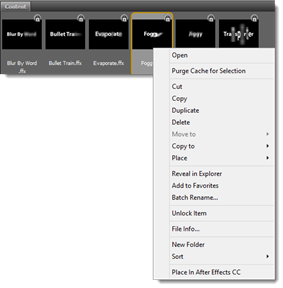
The blur is then applied to the layer.
Remember that you can hit the spacebar to preview the effect.
Now it is time to customize the preset so it looks exactly the way you want. To start, make sure the layer is selected, then press U on the keyboard. This will show you all the layer's animated properties.

Take a look at the Offset property. This specifies how much to offset the start and end of the selection.
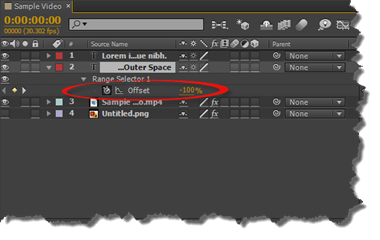
Click the word Offset. This selects both of the animation's keyframes. A keyframe marks the beginning or end of an animation. We have circled the keyframes in our Timeline below.

Now go to Animation>Keyframe Assistant and choose what changes you would like to make. If you choose Time-Reverse Keyframes, for example, it will switch the order of the keyframes.
Scale Keyframes
Earlier in this article, we used Fit to Comp Width to scale a text layer to the width of the composition. When we did that, the size of our text was scaled and it appeared a lot larger on our composition. We can now animate that layer's scale so the text goes back to normal size.
Here is how our text looked after using Fit to Comp Width.

With the layer selected, press S. This will reveal the Scale property.
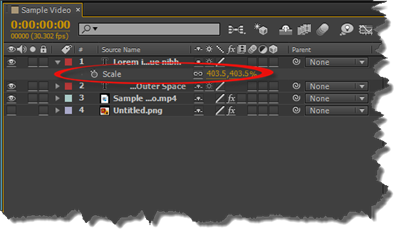
Move the playhead in the Timeline panel to the place where you want to place the keyframe.
Now click on the stopwatch icon to the left of Scale to add the keyframe.
Next, move the playhead forward to another location where you want to add the second keyframe.
Drag the yellow values to the right of Scale to reduce them to 100%.
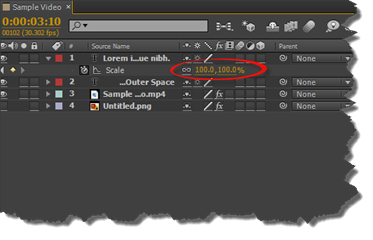
To preview the animation, press Home to go back to the beginning. Then, hit the spacebar.
The end of the animation will seem abrupt when you preview it. To fix this problem, you can use Easy Ease.
Right click on the first Scale keyframe, and select Keyframe Assistant>Easy Ease Out.
Next, click on the second Scale keyframe, and select Keyframe Assistant>Easy Ease In.
Using Parent Child Layers to Create Animation
Let's say we want to apply the same scale animation to another layer in our composition. We could create the scale animation for this other layer, or we can save time by creating parent and child layers.
Using our example from the last article, our "Lorem" layer is the one with the scale animation applied.
We now want to apply the same animation to the "Untitled Layer." This will give us the feeling that the camera is zooming out.
Before we get started, click the Home key to move the playhead back to 0:00.
Next, select the layer named Untitled. In the Parent column, select the layer named Lorem from the dropdown menu, as shown below.

This makes the layer named Lorem the parent layer, and the layer named Untitled the child layer. The child layer inherits all of the parent layer's keyframes, meaning both now share the scale animation.
Using Path Animation Presets
We used presets earlier in this article to create a blur animation effect. Now let's animate text along a motion path using a preset.
When you use a path animation preset in After Effects, the preset comes complete with placeholder text. This means that when you use a path animation preset, you do not have to enter or format the text until after you apply the animation.
To apply a path animation preset, first deselect all layers in the Timeline. Move the playhead to the point where you want the text to first appear.
Go to Animation>Browse Presets.
This opens Adobe Bridge.
Open the Text folder as we did earlier in this article, then open the Paths folder.
The path animation presets are pictured below.
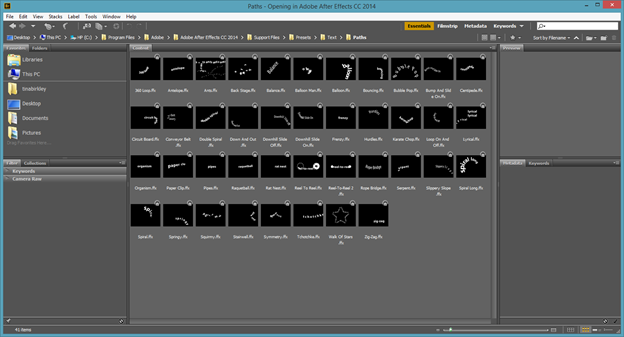
We are going to right click on the Paper Clip preset, then select Place in After Effects CC from the context menu.
The path animation now appears in our composition.
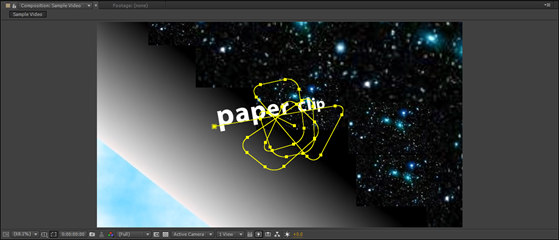
To change the text, click on the Horizontal Type tool in the Tools panel, then click in the placeholder text in the Composition panel. Enter the text that you want to appear.
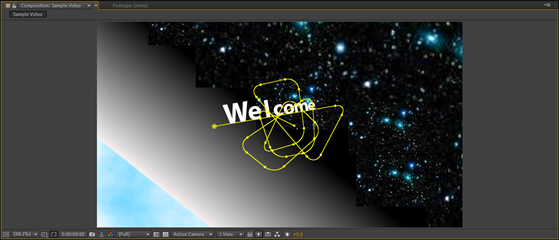
You can edit the motion path by dragging on any of the handles. These handles look like dots are squares that appear on the yellow line above.
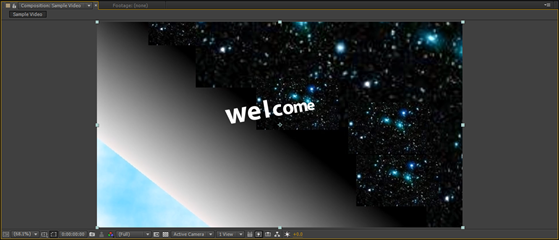
Click in the Composition panel to hide the motion path – or the yellow line shown above.
Adding a Motion Path to a Non-Text Layer
We can also add a motion path to a non-text layer.
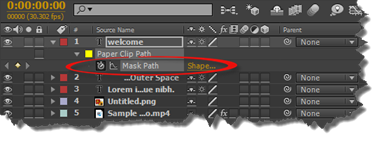
To do this, click on the text layer with the motion path. Ours is called Welcome.
Click M to display the Mask Path property.
Click on the Mask Path property, then go to Edit>Copy.
Now we are going to select the layer with our spaceship. This layer is called Untitled. If you are following along in After Effects as we progress through the article, select a layer for which you want to add the motion path.
Press P on your keyboard to display its properties.
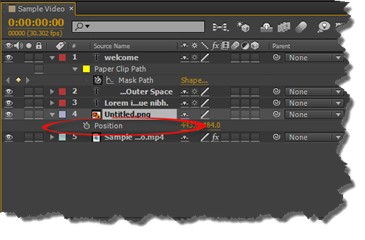
Click on Position (as shown above), then go to Edit>Paste.
The Position keyframes from the source layer are then added to the destination layer.
Now let's set its orientation by going to Layer>Transform>Auto Orient.
You will then see the Auto Orient dialogue box.
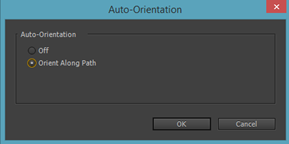
Select Orient Along Path, then click OK.
Creating a Motion Blur
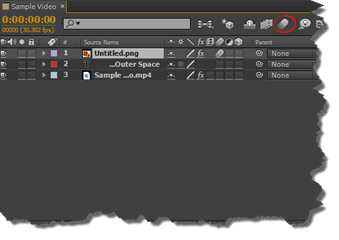
A motion blur is animation that blurs an object as it moves. To create a motion blur, go to the Timeline panel.
Click the Motion Blur switch for the layer that you want to blur as it moves.
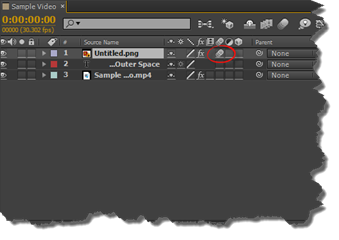
Click the Enable Motion Blur button (circled below) so you can see the motion blur as it occurs in the Composition panel.
Using Text Animation Tracking Presets
When you animate tracking, you make words seem like they expand as they appear on the screen.
To do this, select the text layer for which you want to animate tracking. Move the Timeline playhead to the location where you want the animation to begin.
Next, go to Animation>Browse Presets.
This opens Adobe Bridge.
Open the Text presets folder, then open the Tracking Folder.
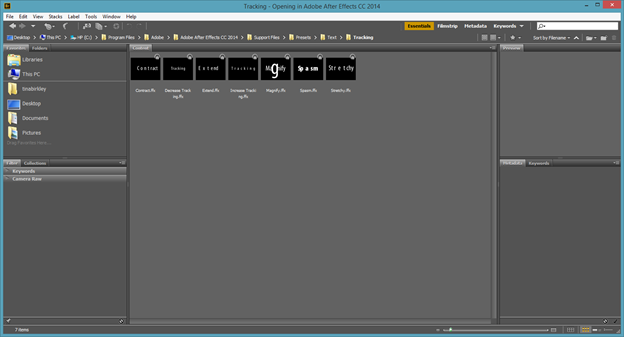
Choose an animation, then right click on it and select Place in After Effects CC from the context menu.
Animating Text Opacity
You can use keyframes to make text fade in or out on the screen.
To do this, select a text layer. Click T on your keyboard to view the layer's opacity properties.
Move the playhead to the point where you want to add your first keyframe. Adjust the opacity value (in yellow) for the frame, then click the stopwatch to add the first keyframe. The stopwatch appears to the left of Opacity, as shown below.

We are going to have our opacity value at 100%.
Next, move the playhead to the point where you want to place the second keyframe. Set your opacity value. We are going to set ours to 50%.
You can add other keyframes if you want so that the text fades in and out.
Exploring Presets
In this article, we have learned to apply presets to create animation by going to Animation>Browse Presets, then opening the Text folder.
Shape Layers
You can use the drawing tools in After Effects to draw different shapes. Whenever you use a drawing tool to create a shape, a new layer is created. This layer is called a shape layer. Once you create a shape layer, you can specify the fill and stroke color, the transparency, and the gradient. You can also animate the shapes.
In this section, we will discuss how to:
-
Draw basic shapes
-
Draw custom shapes
-
Use Pucker & Bloat to distort shapes
-
Duplicate a shape
-
Rotate shapes
-
Apply a cartoon effect
-
Create wiggly shapes to create things such as waveforms
Drawing a Basic Shape
There are five shape tools available in After Effects. These tools are the Rectangle, Rounded Rectangle, Star, Ellipse, and Polygon. Once you draw a shape, you can format the shape by adding stroke and fill colors, as well as linear and radial gradients. In addition, you can also apply animation presets to shapes much in the same way we did with text in the last section.
To draw a rectangle shape, click on the Rectangle tool in the Tools panel. It is circled below.

Next, click in your composition in the Composition panel.
Drag to draw a rectangle.
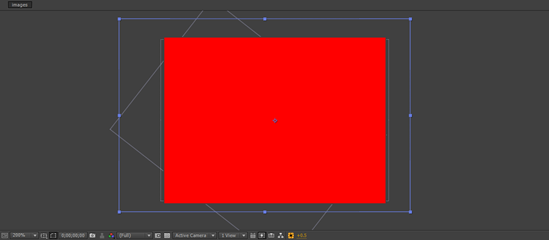
Our rectangle is red and pictured below.
If you look at the Timeline panel, you will see a shape layer has been added.
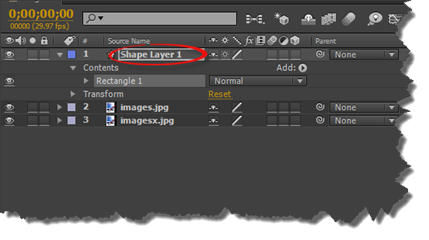
NOTE: Make sure all layers are deselected before you use the Rectangle tool. Otherwise, After Effects will draw a mask for the selected layer instead of a shape in a new shape layer.
To apply a gradient fill to your rectangle, go to the Tools panel again. Click the word FILL.
You will then see the Fill Options dialogue box.
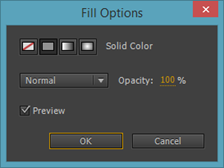
Select a gradient option, then click OK. You can also choose a solid color if you want.
We chose a radial gradient.
Next, click the colored box beside the word FILL in the Tools panel.
If you chose radial gradient, you will then see the Gradient Editor.

Depending on the gradient you chose, you might also see the Shape Fill Color dialogue box.
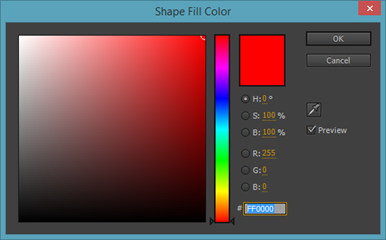
Since the Shape Fill Color dialogue box is self-explanatory and just like the Color Picker in other Adobe programs, let's talk about the Gradient Editor dialogue box.
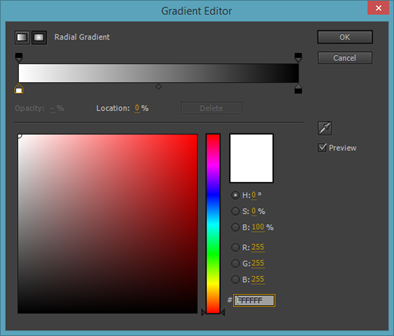
First, set your color stops.
Start with the white color stop on the left. You can drag on it to move it.
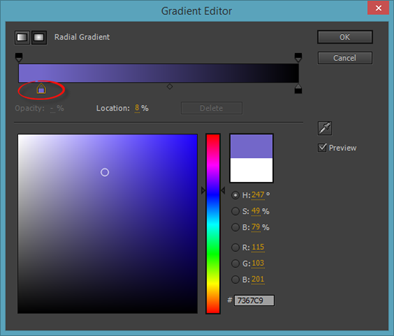
Then, pick a color in the Color Picker box.
Now do the same thing for the black color stop on the right.
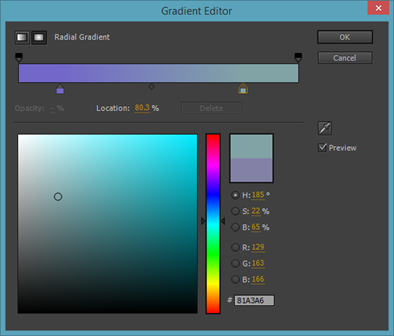
Click OK when you are finished.
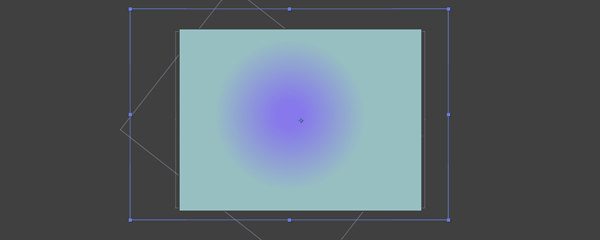
Now you can set the opacity of the new shape layer, as well as adjust its other properties.
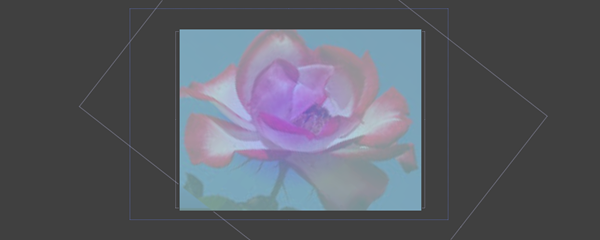
Drawing a Custom Shape
You can modify the path of any shape to change the shape. For example, let's use the Polygon tool. It is located with the Rectangle tool. Just click and hold your mouse button over the triangle in the bottom corner of the Rectangle tool.

Next, drag a polygon shape onto your composition.
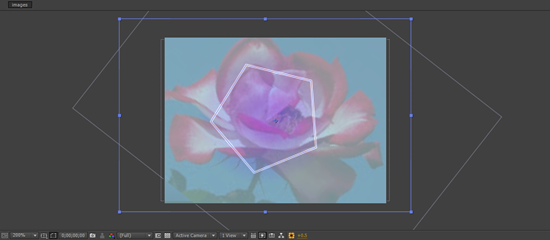
Please note that the Polygon tool uses the settings from the last shape drawn.
Next, go to the Timeline panel. Click the triangle next to Shape Layer 1, then do the same for Contents under Shape Layer 1, Polystar 1 under Contents, then Polystar Path 1, as highlighted below.
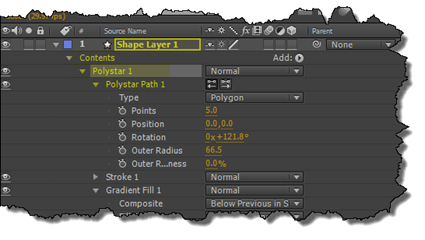
Change the values for Points, Rotation, and Radius.
Then change the value for Outer Roundness.
Watch how your shape changes in the Composition panel.
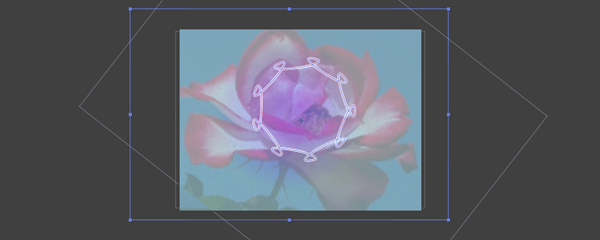
Now you can add a fill color, as well as a stroke color.
To add a stroke color, click the word STROKE in the Tools panel.
In the Stroke Options dialogue box, choose if you want your stroke to be a solid color or gradient.
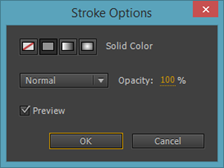
Click OK.
Go back to the Tools panel. Specify the width for your stroke in pixels.

We are going to set ours to 5px.
Next, click the box next to STROKE in the Tools panel to select the stroke color.
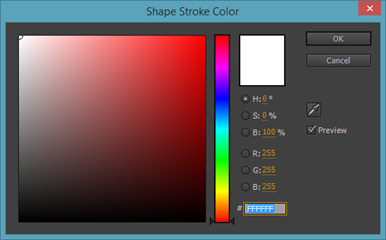
Click OK when you are finished.
Just as with other layers, you can now transform the shape by altering its properties.
Pucker and Bloat Shapes
You can use After Effect's Pucker & Bloat to change the appearance of shapes by puckering and bloating them.
In the snapshot below, we have drawn a star shape on our composition.
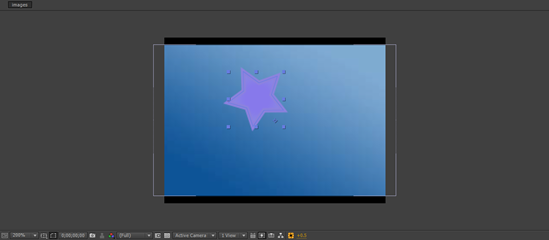
The shape layer is Shape Layer 1, as shown in the Timeline.

Under Shape Layer 1, we are going to click the button beside Add. We have circled it below.

Choose Pucker & Bloat from the menu.
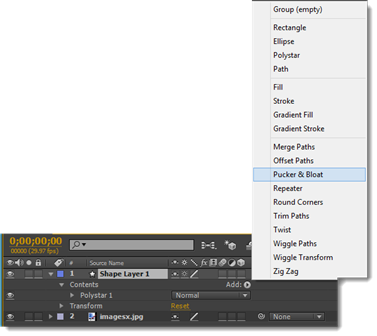
Click the triangle beside Pucker & Bloat to expand it.
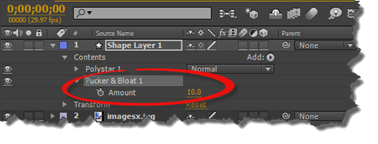
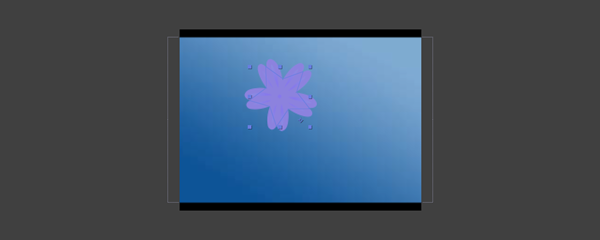
To pucker, reduce the value. To bloat the shape, increase the value.
Duplicate Shapes
To duplicate a shape, select Shape Layer 1 in the Timeline.
Click Add to see the menu, then choose Repeater.
Expand Repeater 1 in the Timeline by clicking the triangle next do it.
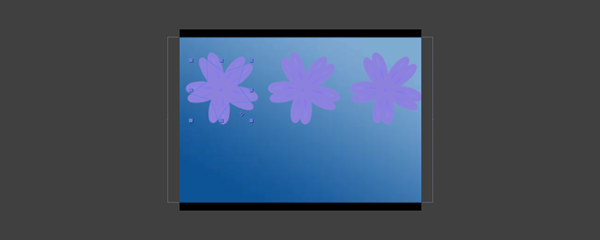
Enter the number of copies (or the number of duplicate shapes) you want to add. We have highlighted it for you in the picture below.
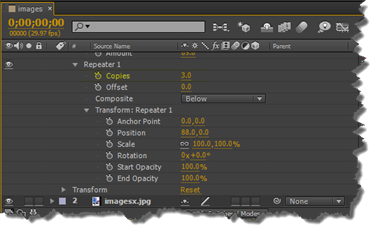
To separate these shapes so that you can see them all, expand Transform below Repeater 1 in the Timeline, as highlighted below.
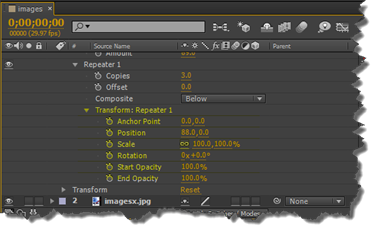
Go to Position. To move the shapes closer to together, use a small number for the first value that appears. This is the X axis. To move them further apart, use a larger number.
Next, you can click the triangle beside Transform under Shape Layer 1 to move the layer's position to display all shapes.
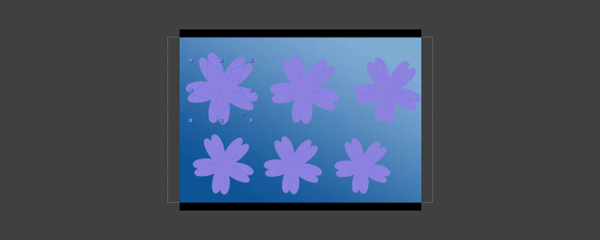
By clicking Add again, then Repeater, we have added another row of shapes to create a background.
Rotating Shapes
Now let's learn to animate those shapes so they rotate in the background. When you apply the rotation for the original shape, the rotation will also apply to the duplicates.
Go to the Timeline panel.
Go to Shape Layer 1>Contents>Polystar 1>Transform: Polystar 1. We have highlighted it below.
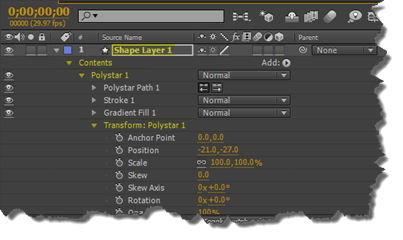
Press the Home key so that your playhead is moved to 0:00.
Next, click on the stopwatch to the left of Rotation.
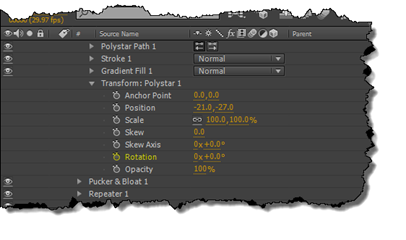
This adds a keyframe.
Now press the End key on your keyboard. This will move the playhead to the end of the Timeline.
Change the value for Rotation. We are going to change ours to 5x, which means the shape will rotate five times in 10 seconds.
Click P to hide the properties for the layer.
You can now drag the playhead across the timeline to view the rotation.
If you want your shapes to blend in more with the background, you can change the opacity for Shape Layer 1.
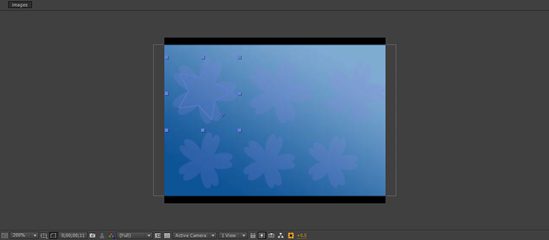
The shapes will still rotate, but fade into the background a bit more.
Applying a Cartoon Effect
After Effects gives you the ability to take images or video and add a cartoon effect to them.
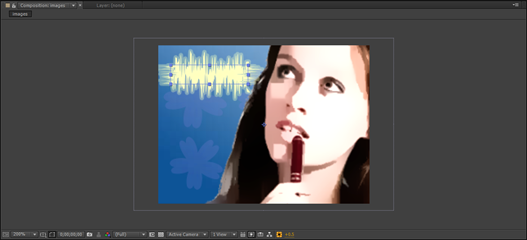
In the snapshot below, you can see our composition with an image of a girl. The name of the layer that contains that image is New.
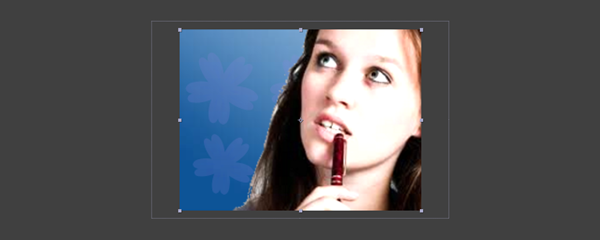
Select the layer for which you want to apply a cartoon effect. Remember that it can be an image or video.
Go to Effect>Stylize>Cartoon.
The snapshot below shows you what happens when you add the cartoon effect.
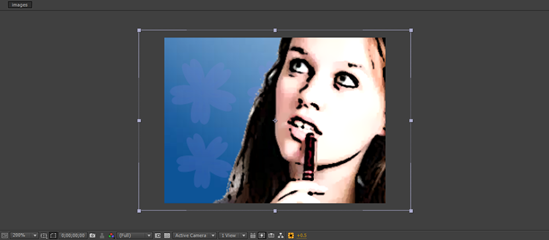
Now we can customize the effect to make it look better. To do this, go to the Effects Control panel. Make sure you are in the Standard workspace so you can see it.
Go to Render, then choose Fill from the menu.
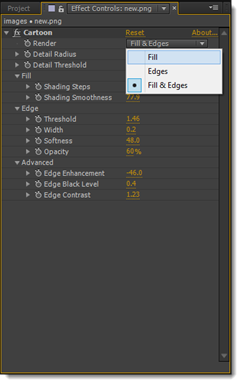
Adjust the Detail Radius and Detail Threshold values. These values determine how much detail is removed and how it is smoothed.
Next, go to the Fill area. Adjust the values for Shading Steps and Shading Smoothness to achieve the fill look you want. These values will determine how the color is reduced, as well as how the gradients are displayed.
We highlighted these areas in the Effects Control panel below.
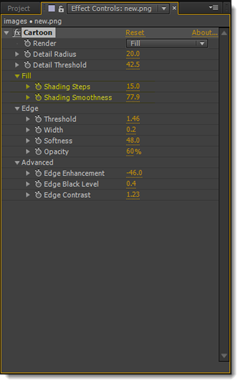
Now go back to the Render menu and choose Edges.
Go to the Edge area in the panel and adjust the Threshold and Width to reduce the black lines that you see. You can also adjust the opacity.
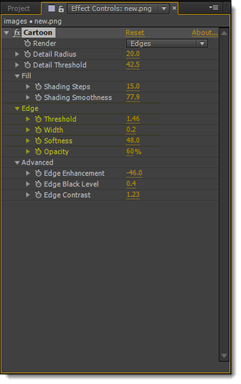
Go back to the Render menu yet again and choose Fills and Edges. Go to Advanced and click the triangle to expand it. You can adjust the values to sharpen or soften the edges.
Take a look at the cartoon effect we have created below.
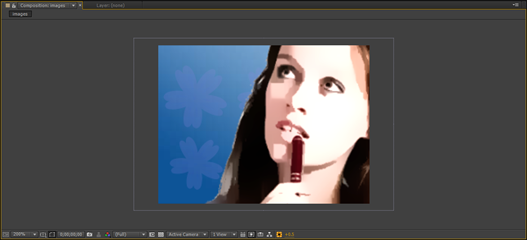
Wiggly Shapes
Wiggly shapes are fun to create. They are shapes that you draw, then turn into something that has curves or jagged peaks that wiggle in your composition. Think of an audio waveform because you can easily turn a rectangle into an audio waveform by using Wiggly Paths.
To start, draw a rectangle on your composition, then select the rectangle's shape layer in the Timeline.
Click the downward arrow to expand the layer's properties, then click the Add button.
Choose Wiggly Paths from the menu.
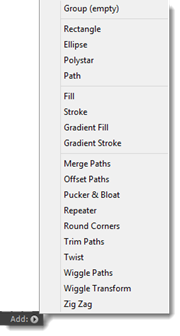
Next, click the triangle next to Wiggle Paths 1. Adjust the values for Size and Detail to achieve the look you want.
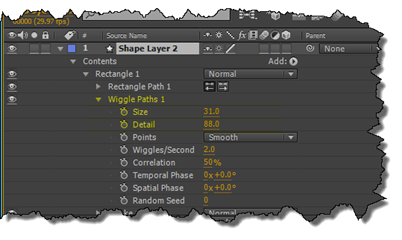
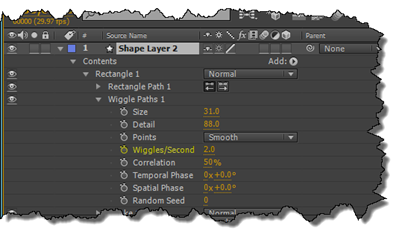
Select Smooth from the Points dropdown menu to smoothen out the path, then determine how many "wiggles" you want per second, as highlighted below.
Your rectangle shape starts to look like this:
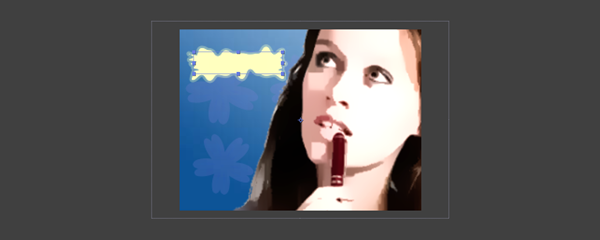
By experimenting with Size and Detail, we easily managed to create an audio waveform:
